Production Process
PLASTISOL DIP MOULDING
PVC dip moulding suits hollow, thin-walled soft sleeves: a preheated mandrel is dipped into PVC plastisol, the resin gels into a skin on the mandrel surface, and curing, cooling and demoulding turn it into a sleeve shaped exactly like the mandrel. What follows is the actual sequence, and what each step controls.
- 01
Drawing and mandrel
The customer drawing or a physical sample is converted into a mandrel drawing: bore, outside diameter, length and the shape of the open end, fixed in one pass. The inside of a dip-moulded part is the outside of the mandrel, so bore tolerance is locked at the tooling stage and no later step can change it.
Existing sizes run on existing mandrels; a new shape needs a new mandrel. Mandrels cost far less than injection moulds, which is what makes small and mixed orders workable.
- 02
Mandrel preheat
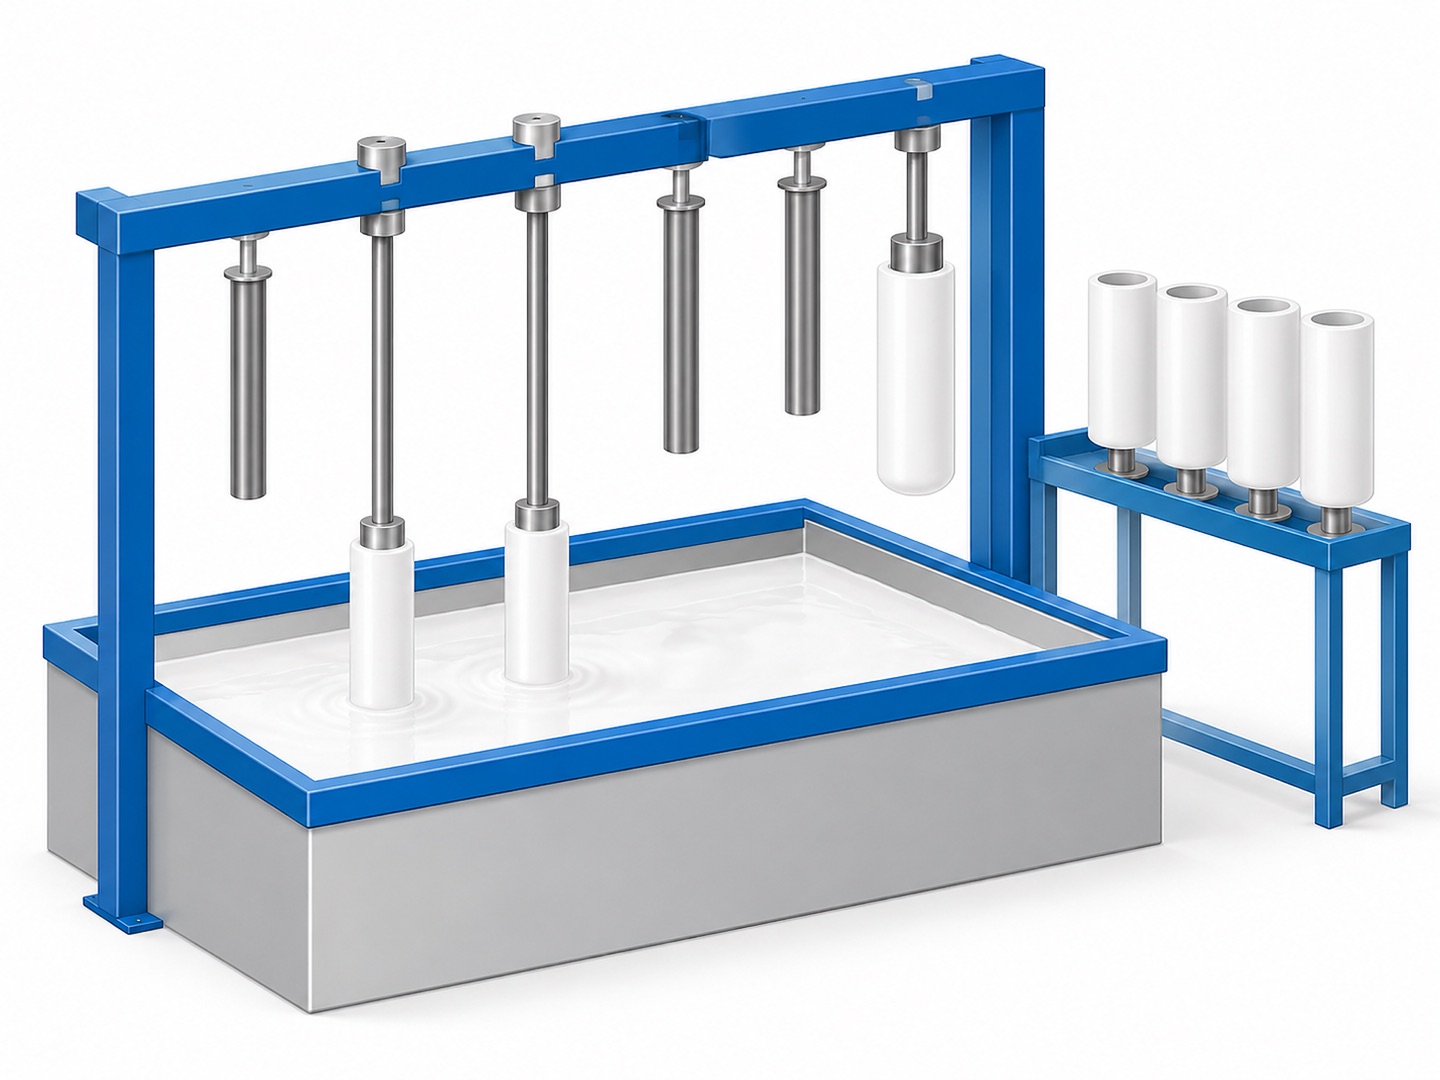
The mandrel enters a heating zone and comes up to process temperature. This decides how evenly the plastisol attaches: on a cold mandrel the resin only lays down a thin film that sags after withdrawal and builds up at the open end; at temperature, the resin gels on contact and the deposit is stable.
Wall thickness has two variables — mandrel temperature and dwell time. The two together produce a repeatable single deposit.
- 03
Dipping
The preheated mandrel is lowered vertically into the plastisol at a set speed. Immersion depth sets the length of the part; dwell time and withdrawal speed set the thickness of the first deposit. Withdraw too fast and the coating is uneven; too slow and the paste runs down the mandrel.
A thicker wall means dipping again: each pass lays a new layer over the gelled skin until the designed wall is reached. That is how dip moulding covers everything from sub-millimetre walls to several millimetres, and why a wall change does not require a new tool.
- 04
Curing
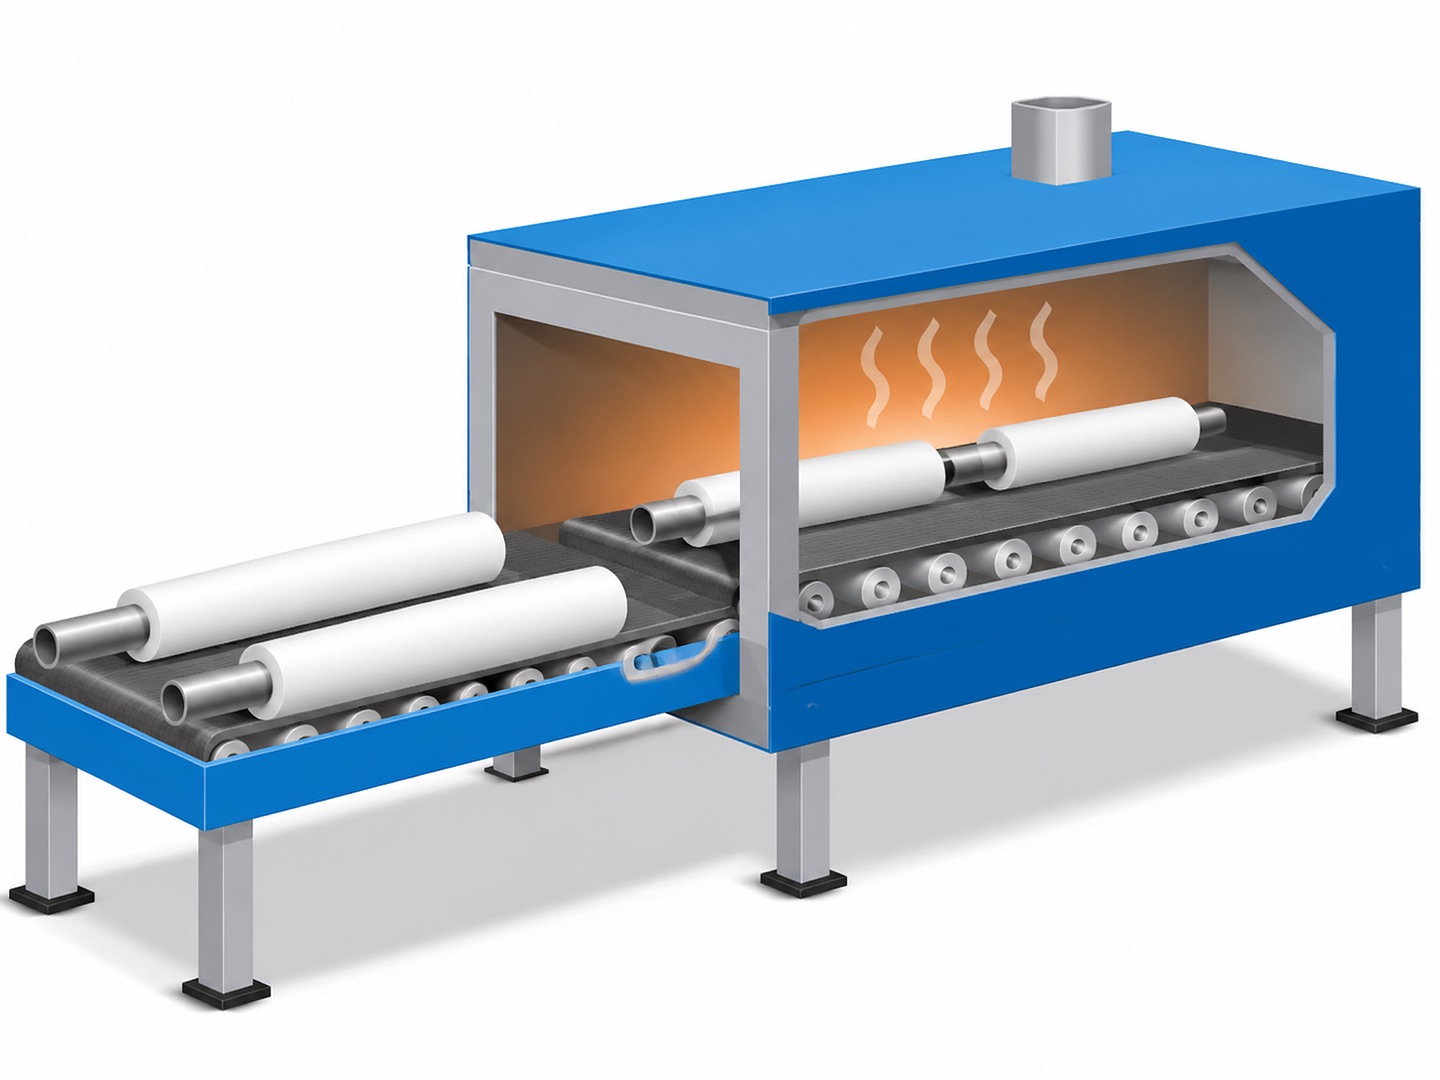
Coated mandrels pass into the oven. The plastisol gels first — resin particles absorb plasticiser, swell and lock into a semi-solid — then fuses, forming a continuous PVC skin.
Too little heat or time leaves the skin brittle, the inner surface tacky and the mechanical properties short of target; too much brings discolouration and hardening. The curve is set by the formulation and the part thickness together, so it is never one fixed number — thin parts run faster, thick parts must slow down.
- 05
Cooling and demoulding
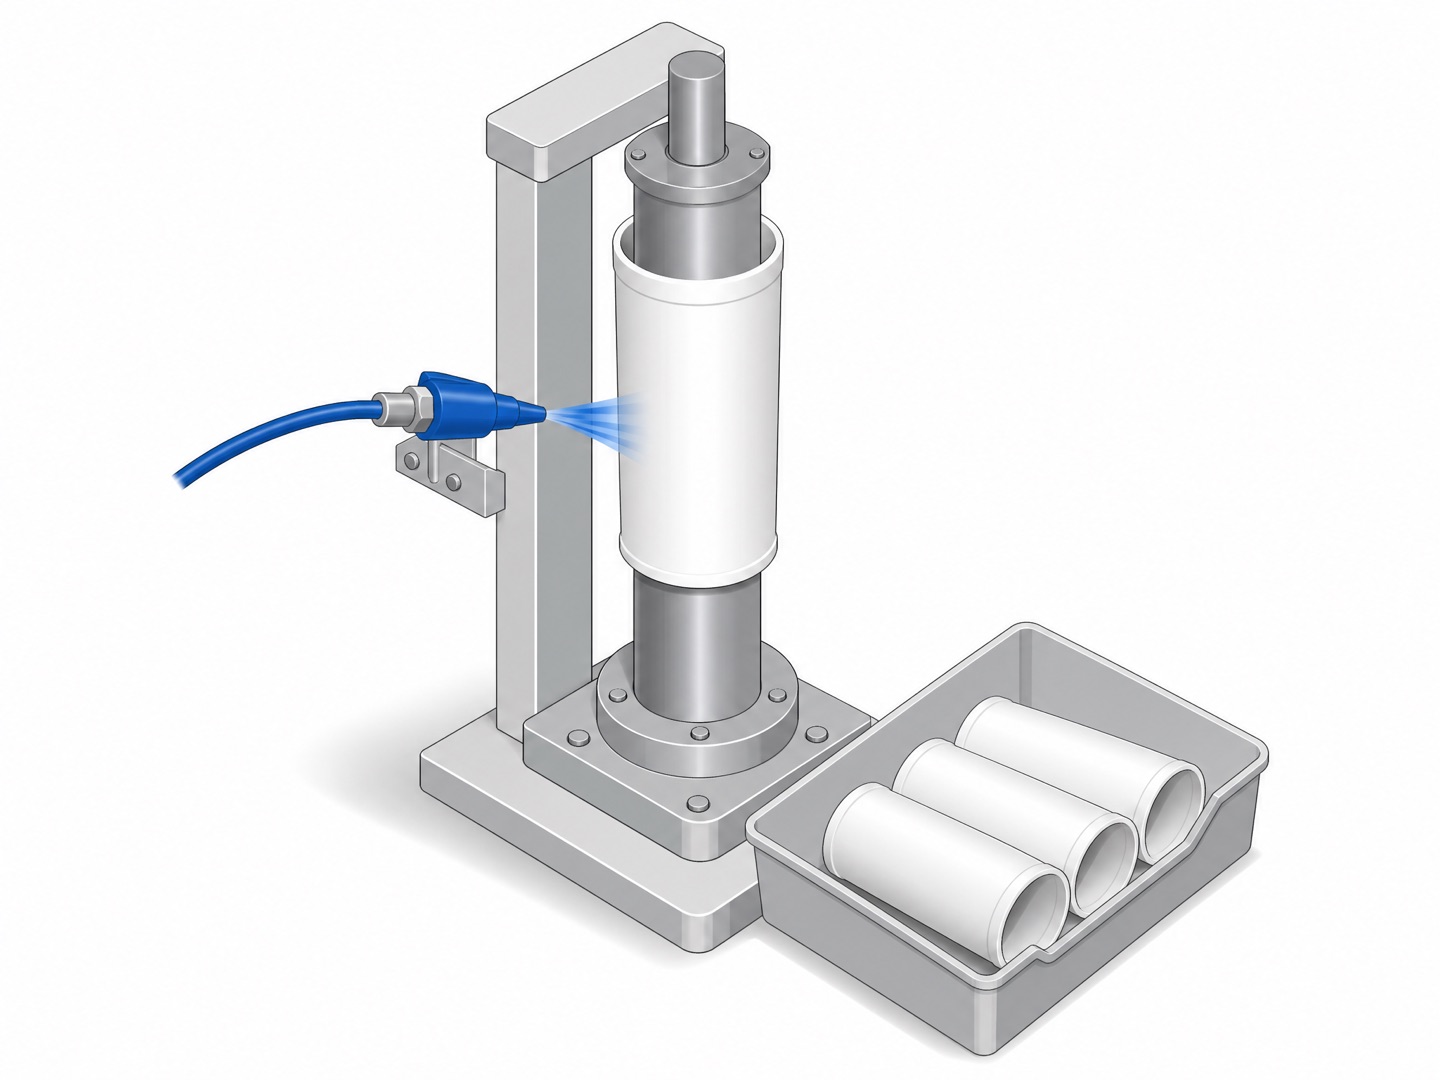
The parts cool before they are stripped. Release too early and the sleeve stretches and never returns to its designed bore; cool too far and it shrinks onto the mandrel, so a forced release tears the open end.
Release is done with air: compressed air through the mandrel port expands the sleeve off the surface, with no pulling by hand. This is what keeps the open end round and free of stress-whitened marks.
- 06
Trimming
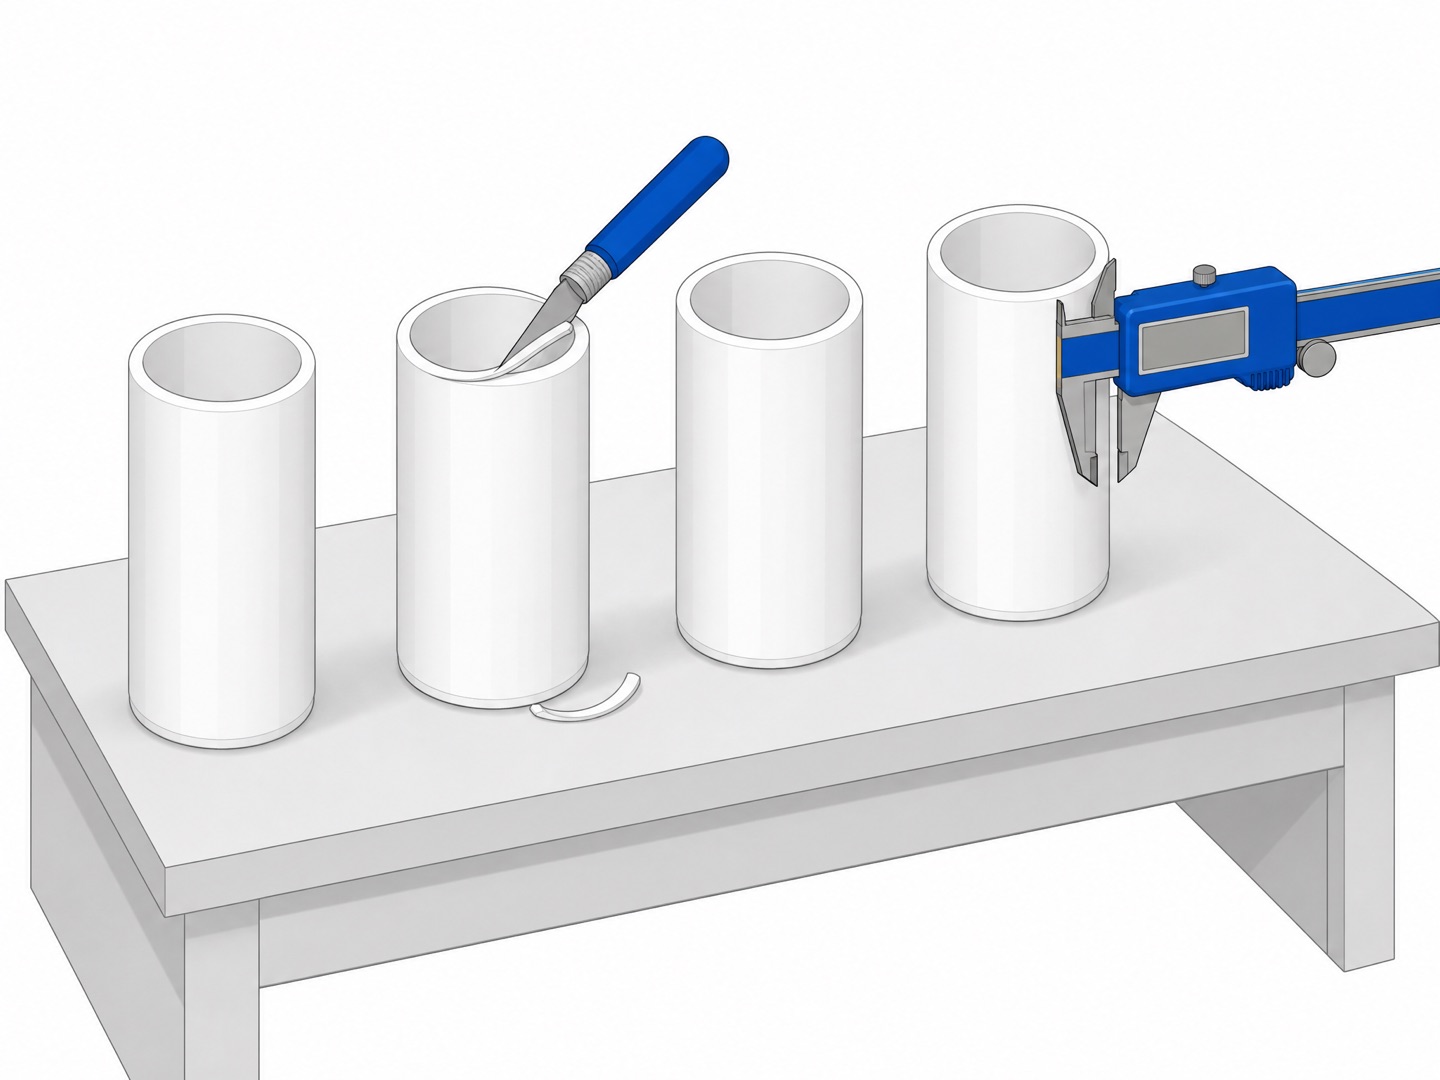
Parting lines, the open end and the air port carry thin flash, removed by hand. Trimming takes flash only — every extra cut removes a layer of wall, and wall is the one dimension an insulating part cannot afford to lose.
- 07
Inspection and packing
Each batch is sampled for bore, wall thickness, length, appearance and colour against the signed sample. Bore is checked with a plug gauge or caliper, wall at the open end — the two dimensions that drift first on a dip-moulded part and the two that fail first at assembly.
Passed parts are bagged by size with part number, specification and lot marked.
Dip moulding or injection moulding
The two are often treated as substitutes, but the division of labour is clear: decide on structure complexity and volume, not on unit price alone.
Choose dip moulding
Hollow, thin-walled sleeves, closed at one end or open at both; frequent changes of wall or length; many sizes in small volumes; a limited tooling budget.
Cheap mandrels and no retooling for a size change are what make dip moulding strong on custom work.
Choose injection moulding
Snap features, internal ribs, multiple cavities, inserts, or a shape that cannot be released with draft; one size at a volume that amortises the mould.
Dimensional consistency and unit cost are better, but any structural change means a tool change.
Six points that decide the outcome
- Mandrel temperature — governs deposit evenness and is the first variable in wall thickness
- Dwell and withdrawal speed — govern single-pass thickness and whether the open end builds up
- Number of dips — governs total wall, and is the only thickness adjustment that needs no new tool
- Oven curve — too little gives a brittle, tacky part, too much gives colour shift and hardening
- Full cooling before release — early release distorts, late release tears
- Trim flash only — every extra cut removes wall
Have a drawing or a sample?
Send the drawing, a photo of the sample, or the assembly requirement. We will say whether the part should be dip moulded or injection moulded, then quote tooling and unit price.